Corn is not finished when it leaves the stalk. Dry grain, popcorn, and seed corn remain biologically and physically vulnerable until excess moisture leaves the kernels and cob. A dry-looking husk can hide a damp cob core. A hard outer kernel can hide a softer center. A sealed bucket can turn a slightly wet harvest into mold.
Drying is a controlled movement of moisture out of the ear. Storage begins only after the grain is dry, cool, clean, and protected from new moisture. The best method depends on whether you are holding whole ears, food grain, popcorn, or seed.
For our work, this distinction is important. The seed company grew out of years when corn was planted wherever land access allowed, sometimes without the permanent irrigation, drying, or storage systems the crop needed. We learned that protecting a variety requires infrastructure after harvest just as surely as it requires soil before planting.
Why drying is a separate crop stage
At physiological maturity, the kernel has reached maximum dry weight, but it can still contain roughly one-third water. That is mature grain, not storage-ready grain. The remaining water must move from the kernel and cob into surrounding air.
Three variables control that movement:
- Relative humidity: Damp air cannot carry away much additional moisture.
- Temperature: Warmer air can speed drying, but excessive heat can crack food grain and damage seed viability.
- Air movement: Moist air must be replaced with drier air. A fan often matters more than a hot room.
Drying too slowly allows fungi and insects more time to develop. Drying too aggressively can crack kernels, reduce milling quality, and injure embryos. The goal is steady drying with good ventilation, not simply maximum heat.
Braiding and corn cribs in a living Haudenosaunee food system
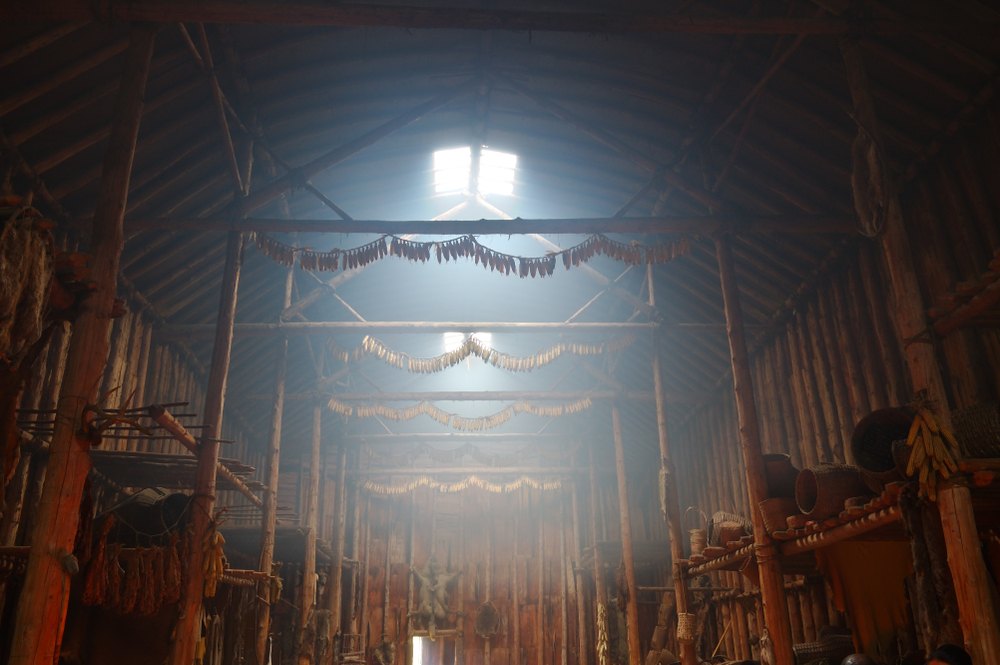
Ganondagan's White Corn Project publicly documents a current Haudenosaunee white-corn harvest system in which ears are husked, braided, placed in a corn crib, and allowed to dry for approximately three to four months before processing. The project also describes corn cribs and movable drying racks as essential infrastructure because they provide ventilation and protection from moisture and animals.
This is not an abstract historical image. It is a living, community-based food project. Braids of Tuscarora White corn hanging inside a Haudenosaunee longhouse also show how the ear, husk, architecture, airflow, labor, and food system can work together.
We should still be precise. One public Ganondagan practice does not stand in for every Haudenosaunee community, every Tuscarora family, or every Native corn tradition. The useful lesson for any grower is specific: whole-ear drying depends on ventilation, protection, time, and a structure built for the work.
Field drying or sheltered drying
Leaving mature ears on the stalk is efficient when autumn weather is dry and pest pressure is manageable. The plant and open air do much of the work. But field drying is not automatically safer. Prolonged rain, humid nights, earworm damage, lodged stalks, birds, raccoons, and ears hanging against wet soil can increase loss.
Continue field drying when:
- Husks are opening and drying evenly.
- Weather is dry with low risk of prolonged rain.
- Ears remain above the soil and stalks are standing.
- Animal and bird losses are low.
- Ear rot is not increasing.
Move ears under shelter when:
- A mature crop faces several wet days.
- Stalks are lodging or ears are touching soil.
- Insect wounds or husk damage expose kernels.
- A hard freeze will stop further field dry-down.
- You need to protect selected seed ears from mixing or theft.
Once harvested, do not leave damp ears in harvest totes overnight. Spread them immediately. A deep pile traps warm, humid air in the center.
How to dry whole ears
Method 1: open racks or screens
Place ears one layer deep on wire racks, slatted shelves, or food-safe screens. Leave space between ears. Rotate them during the first week and inspect the side that rests on the rack.
Method 2: mesh bags
Mesh onion bags work for small lots if they are not overfilled. Hang bags where air can move through all sides. A bag packed tight becomes a humid mass rather than a drying tool.
Method 3: braiding by the husks
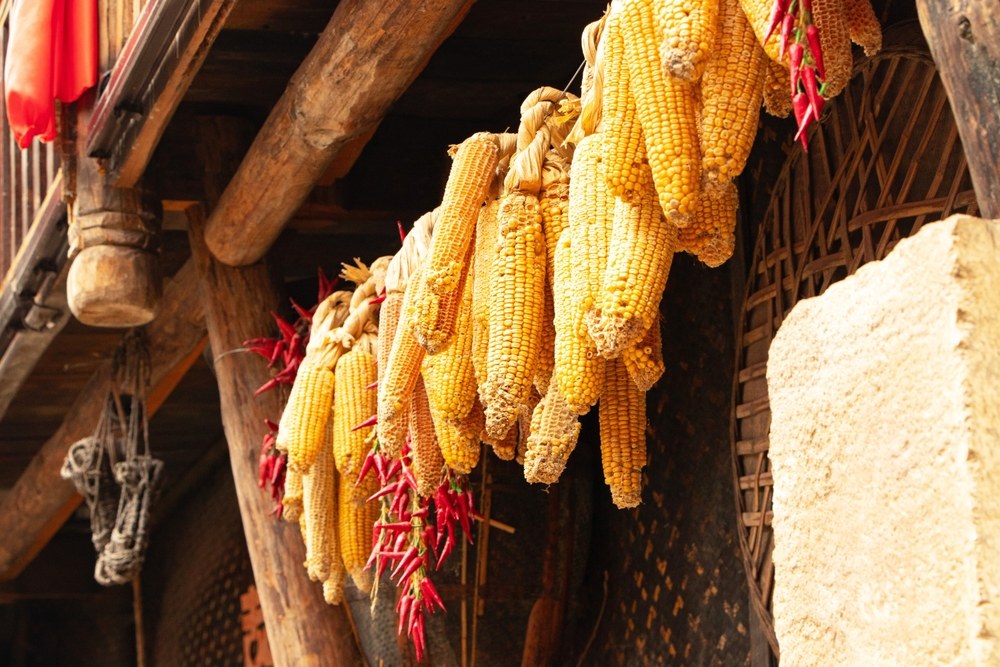
Leave enough sound husk attached to secure the ears. Braid or tie small groups, then suspend them so ears do not press into a wall. Braids are not decorative shortcuts. They work only when the husks are sound, air can circulate, and the structure stays dry.
Method 4: corn crib or ventilated bin
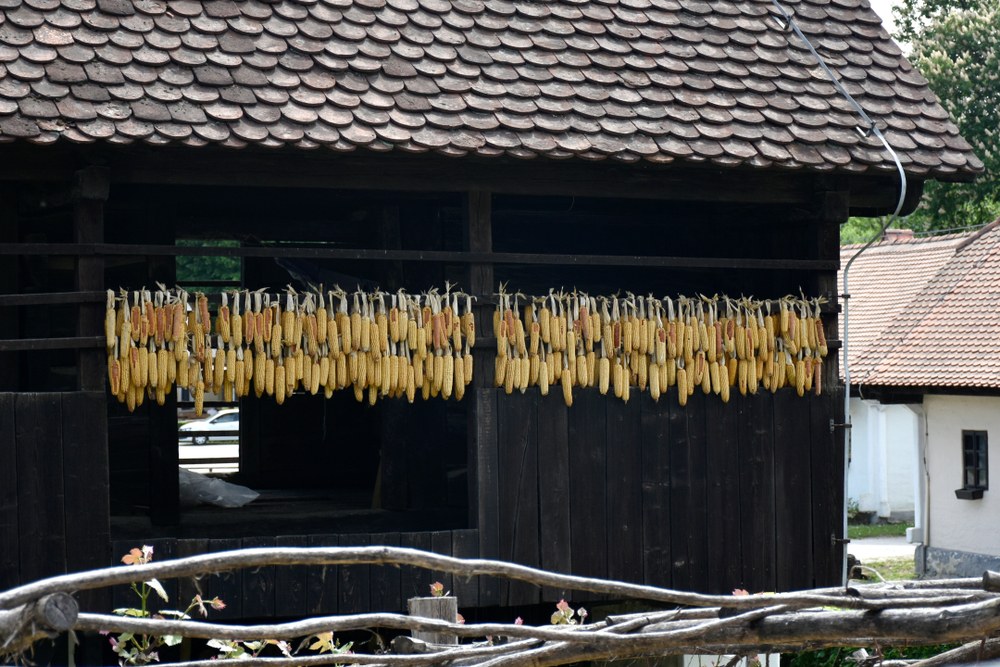
A crib uses depth, spacing, and open sides to move air through ear corn while excluding rain and animals. Home-scale growers can imitate the principle with narrow ventilated racks rather than building a full crib. Avoid solid plastic walls unless forced air is moving through the grain.
Remove or keep the husks?
Loose husks can hold moisture and hide mold. Remove them for rack or mesh-bag drying. Keep selected husks only when braiding or when the husk helps protect an ear in a proven ventilated system. Always peel back enough to inspect the cob and kernel surface.
Airflow, humidity, and layer depth
Most home drying failures come from insufficient airflow rather than a lack of heat. A box fan moving room-temperature air across a shallow layer can be safer for seed than a hot enclosed room.
Set up the drying space
- Keep ears off concrete floors, which can transfer moisture.
- Leave several inches between racks and walls.
- Use a fan to move air across, not only at, the ears.
- Run a dehumidifier in humid climates if the room cannot stay dry.
- Measure room temperature and relative humidity rather than guessing.
- Protect from rodents, birds, and insects without sealing off airflow.
Check the center of the lot. Edge ears dry first and can make the whole batch seem ready. If you are drying several varieties, label every rack, braid, or bag before the ears enter the room.
Temperature limits
Organic Seed Alliance's sweet-corn seed reference allows drying ears on screens at 70 to 100°F with good circulation, while warning against keeping ears at elevated heat beyond the drying period. For valuable seed lots, use the lowest effective temperature and steady airflow. High heat can reduce germination even when the kernel still looks normal.
Build a small-scale corn drying room
A dedicated drying room does not need to be large, but it must be measurable and easy to clean. The room should let you control air movement, humidity, pest exclusion, and lot separation without exposing food or seed to fuel fumes, dust, or condensation.
Basic equipment
- Open wire or food-safe screen racks.
- One or more fans that move air across the racks.
- A dehumidifier sized for the room in humid climates.
- A thermometer and hygrometer at rack height.
- Rodent-proof doors, screens, and sealed wall gaps.
- Washable floor and shelving surfaces.
- Lot tags that stay attached to racks, bags, and braids.
- A grain-moisture meter for shelled samples.
Arrange airflow deliberately
Do not point one fan at the front rack and assume the back rack is drying. Use smoke from a safe test source, tissue strips, or an anemometer to see where air actually moves. Stagger racks so each layer receives fresh air. Leave a return path for humid air to reach the dehumidifier or exit vent.
Limit the load
When the room is overloaded, relative humidity can stay high even with fans running. Add ears in batches and watch the hygrometer. If humidity rises and remains high, remove part of the load or add dehumidification. A small room can dry a large harvest only if the crop enters in manageable layers.
Map the room
Place sample ears at the front, center, back, top, and bottom. Measure or test each zone. Drying rooms often have cool corners and dead-air pockets. Rotate racks only after recording the original position so you can improve the layout next year.
Protect cultural and rare lots
Use separate racks or enclosed ventilated cages for rare seed. A falling ear, loose kernel, or mislabeled braid can mix varieties. Physical separation is part of genetic protection.
Moisture targets and home tests
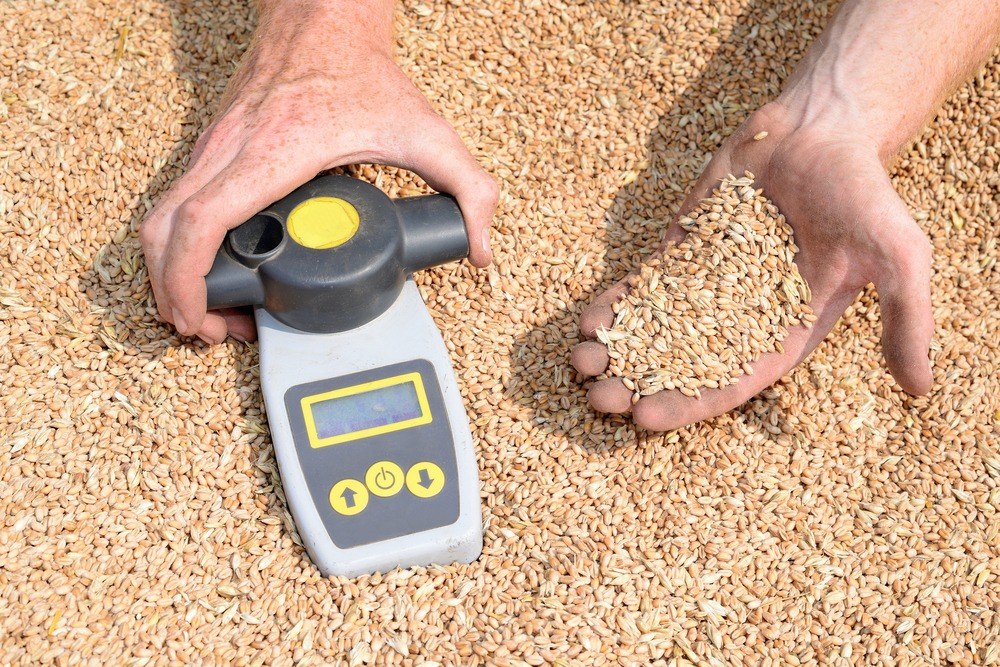
A grain-moisture meter provides the clearest answer. Use a meter calibrated for corn and follow its sampling instructions. Measure several subsamples because ears and kernels do not dry uniformly.
| Use | Practical target | Why it matters | Home-scale check |
|---|---|---|---|
| Popcorn | About 13 to 14 percent | Enough internal moisture for steam expansion without chewiness | Pop a consistent 20-kernel sample weekly |
| Food grain stored up to about six months | Around 15 percent or lower under good conditions | Reduces mold risk during cool short-term storage | Moisture meter plus routine inspection |
| Food grain stored longer than six months | About 13 percent | Warmer seasons shorten safe storage life | Moisture meter; keep cool and clean |
| Seed corn | Dry, hard kernels with stable moisture; often around 12 to 13 percent for cool storage | Limits mold and respiration while protecting viability | Moisture meter plus germination testing; avoid high heat |
| Whole ear corn | Kernels and cob both dry | A dry kernel on a damp cob can reabsorb moisture | Break sample ears and inspect the cob center |
Fingernail test
A fully dry kernel should resist a fingernail. This is useful but not precise enough for a large or valuable lot.
Weight-loss test
A destructive oven test can estimate moisture by weighing a small sample before and after oven drying. Do not return the heated sample to the seed lot. Home ovens and short test times are not laboratory-grade, so use this only as an estimate and follow an Extension method carefully.
Pop test
For popcorn, performance is the most useful household test. Chewy flakes suggest the lot is still wet. Poor expansion in otherwise sound kernels can mean the lot is too wet, too dry, genetically crossed, or mechanically damaged.
When and how to shell corn
Shell only after kernels are hard and the cob is dry. Shelling wet ears crushes embryos, scuffs seed coats, and creates broken pieces that mold more easily.
Hand shelling
Wear a heavy glove and twist one ear against another or rub kernels free with your thumb. This is slow but gives the most control for rare seed, soft sweet-corn seed, and small research lots.
Hand-crank shellers
Adjust the sheller to the ear size and test it on a few ears. Examine kernels for cracks, chipped embryos, and crushed crowns before running the full lot.
Separate tips and butts when needed
Tip and butt kernels can differ in size and shape. For normal garden planting this is often acceptable, but precision planters may handle more uniform seed better. Do not remove so much from small seed lots that you reduce the number of maternal plants represented.
Clean after shelling
Screen and winnow out cob pieces, chaff, silk, lightweight kernels, insect debris, and broken grain. Clean grain stores better because fines restrict airflow and carry more mold spores.
How to store shelled corn and whole ears
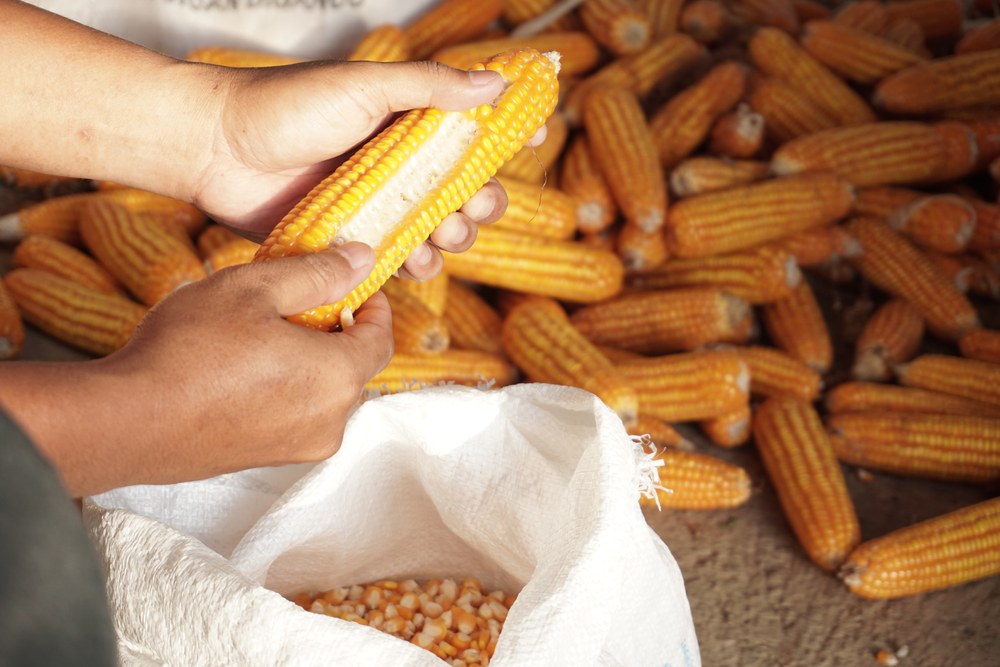
Store only dry corn. Use food-grade buckets, glass jars, metal bins, heavy freezer bags, or other containers suited to the lot size and intended use. Airtight storage protects dry grain from humid air, but it traps moisture just as effectively if the grain was sealed too early.
Whole ears
Whole ears can remain on racks or in a crib if the environment stays dry and protected. Inspect the cob ends and ear centers. Whole ears take more space but preserve visual identity and let you evaluate each ear before shelling.
Shelled food grain
Store clean kernels in labeled containers. Include variety, harvest year, intended use, lot number, and whether the grain was grown under controlled isolation.
Popcorn
Once popping quality is good, store kernels airtight so they do not continue losing moisture. If popcorn becomes too dry, some growers recondition a small amount, but uncontrolled rewetting can create mold. It is safer to protect the correct moisture from the start.
Container size and inspection access
Large containers reduce packaging, but they can hide a problem until the whole lot is affected. Divide valuable food and seed grain into manageable containers. A five-gallon bucket is easier to inspect, rotate, and isolate than one large bin. Keep a representative jar from each lot near the front of the storage area for routine checks, but remember that the sample does not replace inspecting the main containers.
Temperature stability
Steady cool storage is safer than repeated warming and cooling. Temperature swings move moisture through grain and can create damp zones near container walls or lids. Keep containers away from exterior walls, direct sun, heaters, and uninsulated roofs.
Cold storage
Cool temperatures slow insects, mold, and seed aging. Prevent condensation by allowing a sealed cold container to reach room temperature before opening it. Repeatedly opening a cold jar in humid air can introduce moisture.
Preventing insect damage
Stored-grain insects can arrive from the field, old containers, shelving cracks, or nearby grain. Sanitation begins before the new harvest enters the room.
- Clean bins, racks, shellers, and floors between lots.
- Do not mix new grain with remnants from an older infested lot.
- Screen out broken kernels and fines.
- Inspect monthly for live insects, webbing, powder, holes, heat, or odor.
- Keep seed lots in smaller sealed containers so one infestation does not reach everything.
Freezing can kill many storage insects, but treatment time and temperature depend on the insect and lot size. If you use freezing, begin with fully dry grain in sealed containers and let the container warm while still sealed to prevent condensation. For valuable seed, test germination after any treatment.
Mold, mycotoxins, and grain that should not be kept
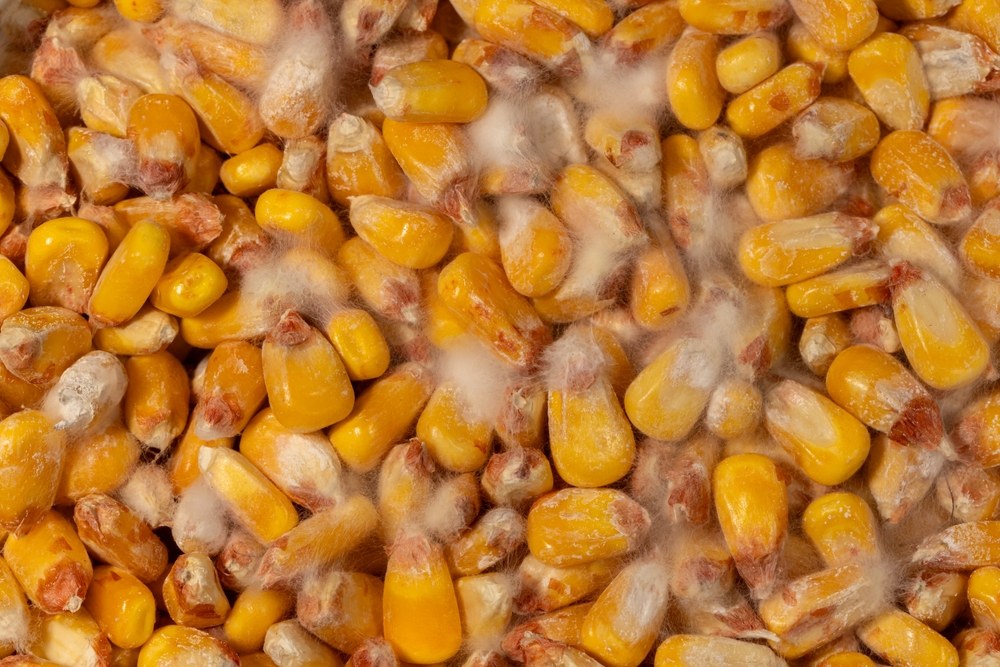
Drying can stop additional fungal growth when moisture is brought under control. It cannot remove mycotoxins already present. Some toxins remain in food and feed after the visible mold dries.
Do not keep ears with:
- Widespread fuzzy growth.
- Strong musty or sour odor.
- Soft, wet, or discolored cob tissue.
- Large areas of lightweight, shriveled, or insect-damaged kernels.
- Unknown mold in a lot intended for food, livestock, or sale.
Mycotoxin contamination can be uneven. A few normal-looking ears do not prove a large lot is safe. If a meaningful food or feed crop shows ear mold, consult Extension and use a qualified laboratory sampling plan. Do not blend questionable grain into sound grain.
Seed saving has an additional concern: moldy ears can carry weak seed and seedborne disease. The desire to preserve a rare variety does not make compromised kernels healthy. Preserve the sound ears and document the loss.
Store corn according to the food you plan to make
Whole kernels protect flavor, oils, and aroma better than meal or flour. Whenever possible, store corn as clean whole grain and grind smaller amounts as needed.
Cornmeal and flour
Mill only fully dry, clean grain. Soft flour corn mills easily, while flint can require a stronger mill and may produce a coarser texture. After grinding, store meal airtight and cool. Whole-grain cornmeal contains the germ and its oils, so it becomes rancid faster than intact kernels.
Grits
Grits depend on particle size and, in some traditions, whether the hull and germ remain. Keep the source grain labeled by variety and processing method. A hard flint and a softer dent can behave differently in the same mill setting.
Hominy and hulled corn
Store sound dry whole kernels until processing. Do not use moldy or insect-damaged corn for alkaline cooking. The processing changes the hull and food characteristics, but it does not make unsafe grain safe.
Masa
Nixtamalized corn is normally prepared from dry grain. Variety, kernel hardness, and drying quality affect cooking time, water uptake, grinding, and dough texture. Keep small test lots separate until you know how a variety performs.
Parched corn
Use fully mature, dry, sound kernels. Unevenly dried kernels roast unevenly and may scorch outside while remaining tough inside.
Popcorn
Protect the 13 to 14 percent moisture range after testing. Store in smaller airtight containers so repeated opening does not expose the whole lot to humid air.
Label food containers with the variety as well as the generic word "corn." The point of growing distinct corns is lost if every dry kernel becomes an anonymous pantry mix.
Drying seed corn versus food corn
Food grain can tolerate processing conditions that living seed cannot. Seed must keep the embryo alive.
For seed corn:
- Use gentle shelling.
- Avoid prolonged high temperatures.
- Keep maternal ear identity until selection and records are complete.
- Store cool, dry, and dark.
- Run a germination test before planting or sale.
- Keep backup seed in a separate container and, when possible, a separate building.
For food corn:
- Clean out damaged kernels and foreign material.
- Store at moisture appropriate to the expected storage period.
- Use food-grade containers.
- Mill only what you will use soon because whole kernels protect quality longer than flour.
A lot can serve as both food and seed only if it was grown, selected, dried, and handled to seed standards. Once grain has been overheated, cracked, mixed, or exposed to mold, it may no longer be a responsible seed lot.
Lot records and a storage inspection schedule
Every container should carry enough information to make sense a year later. At minimum, record:
- Crop and variety.
- Lot or field identifier.
- Planting and harvest year.
- Pollination method and isolation notes.
- Number of selected plants or ears.
- Drying method and dates.
- Moisture reading at storage.
- Intended use: food, popcorn, seed, trial, or backup.
Inspection schedule
Inspect weekly during the first month, then monthly. Open a representative container, smell the grain, check for insects, look for condensation, and compare temperature with the room. Warm spots can signal biological activity.
For seed, add an annual germination test and a note on seedling vigor. Germination percentage alone does not capture weak, delayed, or abnormal seedlings.
Troubleshoot common drying and storage failures
The husk is dry but the cob is damp
Break a sample ear through the center. If the pith feels cool, flexible, or damp, return the lot to open racks. Increase spacing and airflow. Whole ears dry from the outside inward.
Condensation appears inside the container
Open the container immediately, spread the grain, and measure moisture. Condensation means the grain, container, or surrounding air was not at equilibrium. Inspect for heat and odor before returning it to storage.
Kernels are hard outside but soft inside
This can happen when drying is too hot or rapid. The surface dries first and slows moisture movement from the center. Reduce heat, use gentler airflow, and allow moisture to equalize before retesting.
Popcorn pops poorly
If flakes are chewy, continue drying. If kernels barely expand and seem extremely hard, the lot may be too dry. Also consider cross-pollination, cracked hulls, immature grain, or variety limitations. Compare with a known sample before changing moisture.
Kernels crack during shelling
The sheller may be too aggressive, the ears may be too dry, or kernel size may not match the equipment. Slow the sheller, adjust clearance, or hand-shell seed ears.
Stored grain develops insects
Isolate the container, inspect nearby lots, clean the storage area, and decide whether the grain is still suitable for its intended use. Do not return infested grain to the general room while live insects remain.
A few ears show mold
Remove the affected ears and inspect the entire lot. Mold concentrated around insect-damaged tips may be limited, but widespread ear rot can signal a larger food-safety problem. Do not blend questionable kernels into sound grain.
Seed germination falls after storage
Review harvest maturity, drying temperature, mechanical damage, storage moisture, and temperature fluctuations. Keep a retained sample from the original lot so you can distinguish storage decline from weak seed at harvest.
Frequently asked questions
Can I dry corn in the oven?
Do not oven-dry seed you intend to plant. For food grain, household ovens often heat unevenly and can scorch or crack kernels. Airflow, racks, a dehumidified room, or equipment designed for grain are safer.
Should corn husks be removed before drying?
Remove loose husks for rack or mesh-bag drying. Keep sound husks when braiding or when using a proven ventilated whole-ear system. Always inspect beneath the husk first.
How long does corn take to dry?
It can take several weeks to several months depending on harvest moisture, ear size, humidity, temperature, and airflow. Ganondagan publicly documents three to four months of crib drying for its braided white corn.
Can dry corn be stored in plastic totes?
Yes, if the grain is truly dry and the tote is food-grade for food grain. A sealed tote is dangerous for damp grain because moisture cannot escape.
What moisture should popcorn have?
About 13 to 14 percent is the usual target. Use repeated pop tests if you do not have a moisture meter.
Can moldy corn be cleaned and eaten?
Visible mold may indicate toxins that cleaning and drying do not remove. Separate the lot and consult Extension or a qualified laboratory rather than tasting or blending it.
Should I store corn as ears or kernels?
Whole ears preserve ear identity and make selection easier. Shelled kernels use less space and can be sealed against insects and humidity. Many seedkeepers keep selected ears intact until final evaluation.
Sources and further reading
- Ganondagan: White Corn Project
- Ganondagan: Annual Appeal and Corn Crib Project
- Ganondagan: 2024 Husking Bee
- University of Minnesota Extension: Growing Popcorn
- University of Minnesota Extension: Corn Growth and Development
- Organic Seed Alliance: Sweet Corn Seed Production Quick Reference
- Purdue Extension: Securing This Year's Harvest
- Iowa State University Extension: Stored Corn Quality
- Iowa State University Extension: Mycotoxins and Corn Storage