Additional Tips — Green Zebra Tomato (Solanum lycopersicum)
Harvesting:
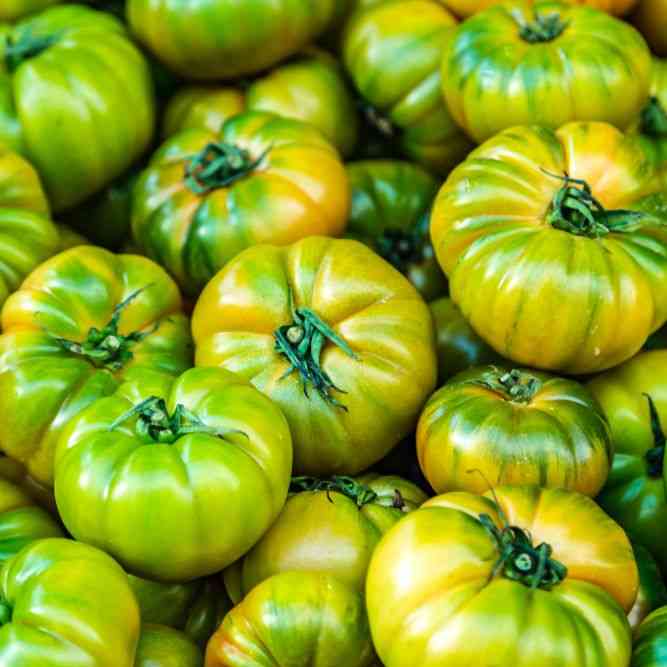
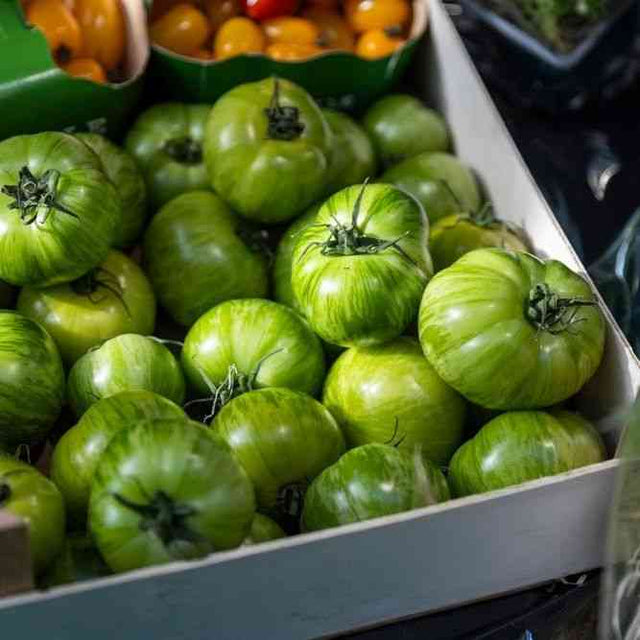
Harvest when fruits display their signature pattern of bright chartreuse skin marked by deep emerald striping, and the lighter areas turn slightly golden beneath the green hue. Fully ripe fruits average 3–4 ounces and yield slightly to gentle pressure near the stem while maintaining firm texture.
Use pruning shears or scissors to harvest to prevent tearing delicate skins. Avoid twisting or pulling, as this can damage the stem and affect continued production.
Check vines frequently—Green Zebra often holds its color pattern even when fully ripe, so touch and subtle tone shift (a slight amber blush) are reliable cues. Pick every few days during heavy production to maintain vine vigor.
Flavor & Culinary Use:
Green Zebra is prized for its bold, tangy flavor with a hint of sweetness and a crisp, citrusy finish. Its flesh is dense and juicy, with balanced acidity that makes it a chef’s favorite for contrast in dishes.
Perfect for fresh eating, salsas, and plating, where its striking color adds vibrancy. The flavor deepens when roasted, producing a sweet-savory complexity ideal for sauces, chutneys, or paired with grilled meats.
Its bright tang complements creamy or fatty foods—avocado, mozzarella, burrata, or olive oil—balancing richness with lively acidity. Green Zebra also shines in chilled soups and green tomato relishes.
Handling & Storage:
Keep harvested fruits at 55–70°F (13–21°C) in a shaded, ventilated location. Do not refrigerate; cool storage dulls its sharp flavor and causes flesh softening.
Arrange in a single layer on padded trays or paper-lined baskets to avoid bruising the skin. Green Zebra’s firm texture offers good shelf life—typically 6–8 days when stored properly.
For market transport, pick slightly underripe; the fruit will finish ripening evenly at room temperature without loss of flavor.
Pruning & Support:
As an indeterminate variety, Green Zebra benefits from strong vertical support and regular light pruning. Provide cages or stakes 6–7 feet high and tie vines gently with soft ties as they grow.
Remove lower leaves after establishment to prevent soil-borne disease. Pinch suckers below the first flower cluster to direct energy into fruit production.
Avoid over-pruning, as moderate leaf canopy helps shade the fruit and prevent sunscald, which can dull the signature green striping. Regular training improves airflow and fruit uniformity.
Sun & Water Tips:
Provide 6–8 hours of direct sunlight daily for best color definition and flavor development. In very hot climates, light afternoon shade maintains fruit firmness and prevents stress.
Water deeply once or twice per week, maintaining consistent soil moisture to prevent cracking and uneven ripening. Apply mulch—straw, compost, or shredded leaves—after the soil warms to retain moisture and stabilize soil temperature.
Use drip irrigation or soaker hoses to avoid wetting foliage and reduce the risk of foliar diseases. Consistent hydration enhances both yield and acidity balance.
Seed Saving:
Select seed from healthy, true-to-type plants bearing well-striped fruits with rich, tangy flavor. Allow chosen fruits to ripen fully on the vine for mature seed development.
Scoop seeds and pulp into a jar with water and ferment for 2–3 days to break down the gelatinous seed coating. Stir daily to prevent mold, then rinse thoroughly and spread seeds thinly on a non-stick surface or fine mesh to dry for 7–10 days in shade with good airflow.
Store fully dried seeds in airtight containers in a cool, dark, and dry environment. Properly cured Green Zebra seeds remain viable for 4–6 years. Being open-pollinated, they breed true unless cross-pollinated by nearby tomatoes; maintain 25–50 feet of isolation for purity.
Ecological & Pollinator Notes:
Green Zebra thrives in organically rich, well-drained soil with steady moisture and active soil life. Its open blossoms attract pollinators such as bumblebees and hoverflies, increasing fruit set through vibration pollination.
Interplant with flowering herbs like basil, dill, or calendula to encourage beneficial insects while deterring common pests. Rotate tomato crops every 2–3 years with legumes or leafy greens to replenish nitrogen and reduce disease buildup.
Avoid planting near other nightshades such as potatoes or peppers. Space plants 30–36 inches apart for optimal airflow and even light exposure. Adding compost or worm castings yearly enhances microbial vitality and fruit complexity.
Culinary Pairings & Presentation Tips:
Green Zebra’s vivid appearance and crisp acidity make it a showpiece in both home and professional kitchens. Use raw to brighten salads, stack in layered caprese with red or orange heirlooms, or dice into fresh salsa verde.
Roast with olive oil and garlic for a zesty, caramelized condiment or blend into a vibrant green tomato chutney with lime and ginger.
Pairs beautifully with smoked fish, goat cheese, citrus vinaigrettes, or roasted vegetables. For presentation, combine with yellow and purple tomatoes to emphasize contrast—the bright green striping evokes freshness, vitality, and modern culinary artistry.Ways to use and enjoy tomatoes
Uses and Benefits of Tomatoes
Culinary Uses
Tomatoes are among the most useful and diverse crops a grower can raise. Their natural harmony of sweetness, tang, and savory depth makes them a foundation of cuisines across the world. Nearly every culture has found ways to preserve, cook, or celebrate the tomato, and each type offers its own best use.
General Preparation Methods
Fresh Eating: Tomatoes can be sliced, diced, or eaten whole for a refreshing burst of flavor. Their acidity balances rich or oily dishes, and their juice adds natural umami depth to plant-based meals.
Cooking: Tomatoes transform when heat is applied—their sugars caramelize, their acidity mellows, and flavors deepen. Stewed or roasted tomatoes form the base for soups, sauces, chutneys, and gravies.
Preserving: Tomatoes are among the easiest crops to preserve. They can be sun-dried, oven-dried, canned, or frozen, retaining their bright taste for winter use.
Fermentation and Pickling: Sliced green or ripe tomatoes can be fermented with salt or lacto-cultured for tangy condiments rich in beneficial microbes.
Juices and Pastes: Pureed tomatoes yield smooth juice or concentrated paste for storage, sauces, and cooking.
Uses by Type
Each category of tomato lends itself best to certain culinary or preservation uses:
Slicer Tomatoes (Large and Beefsteak types):
Best for sandwiches, burgers, and fresh salads. Their large, juicy slices hold flavor and texture well. Excellent for thick sauces or roasted preparations.
Cherry and Grape Tomatoes:
Naturally sweet and quick to mature, these are perfect for snacking, salads, roasting, and skewers. They can be dried or blistered in oil for concentrated flavor.
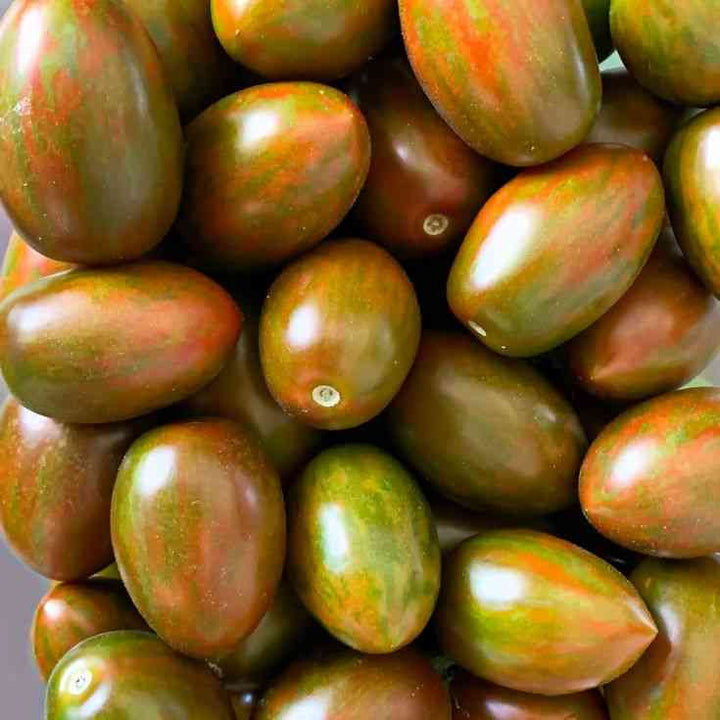
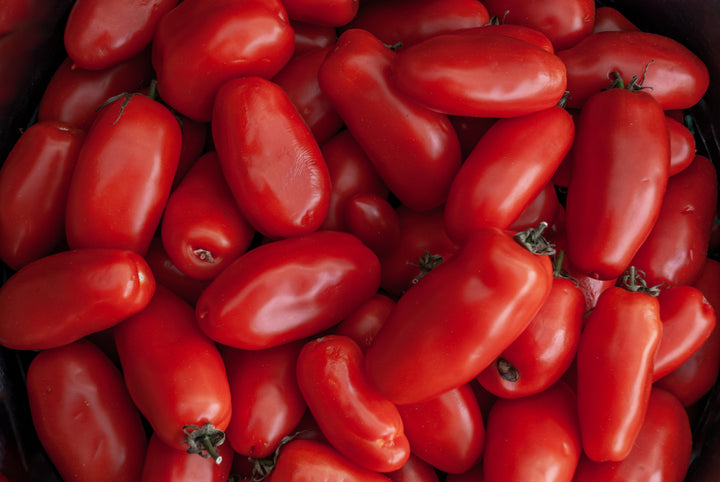
Paste and Plum Tomatoes (Roma types):
Contain less water and more flesh, making them ideal for cooking down into sauces, ketchups, and pastes. Their texture holds well in slow-cooked dishes.
Canning or Processing Varieties:
Balanced between juice and flesh, these tomatoes are excellent for large-batch preserving. They peel easily, making them useful for stewed tomatoes, soups, and juice.
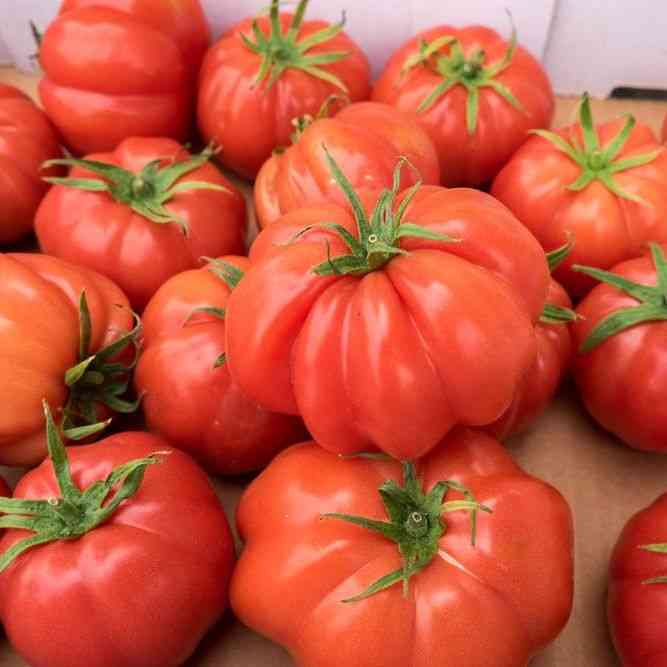
Heirloom Tomatoes:
Valued for their distinct colors, shapes, and complex flavors. Best enjoyed fresh, in salads, or as centerpiece ingredients where their taste and appearance shine.
Green or Specialty Tomatoes:
Unripe fruits or green varieties can be fried, pickled, or used in relishes. Their firm flesh and bright acidity make them unique for savory applications.
Nutritional Benefits
Tomatoes contribute richly to a healthy diet without overstating medicinal claims. They are naturally low in calories and high in hydration, providing essential nutrients that support overall well-being:
Vitamins: High in vitamin C, vitamin K, and vitamin A (as beta-carotene), which support immune function, bone strength, and visual health.
Minerals: Provide potassium, manganese, and trace amounts of iron and copper.
Phytonutrients: Contain lycopene, beta-carotene, and chlorogenic acid—antioxidants that help neutralize free radicals.
Dietary Fiber: Promotes digestion and balances blood sugar when eaten with other whole foods.
Cooking tomatoes increases lycopene availability, while fresh tomatoes retain higher vitamin C content, making both raw and cooked forms valuable parts of the diet.
Cultural and Practical Benefits
Tomatoes carry deep cultural significance. They connect growers and cooks through shared tradition, adaptation, and local flavor. Their ease of growth and abundance make them a cornerstone of seed sovereignty and community gardening.
Adaptability: Tomatoes thrive in containers, raised beds, and open fields, providing harvests even in limited space.
Economic and Community Value: A reliable crop for market growers and home seedkeepers alike. Fresh tomatoes, sauces, and preserved goods can all be sold or traded within local economies.
Seed Stewardship: Saving tomato seeds encourages local adaptation to soil and climate. Over time, these saved lines develop regional hardiness and flavor that reflect the land itself.
Teaching and Sharing: Tomatoes are often a beginner’s introduction to seed saving, fermentation, and seasonal cooking, bridging generations and passing on knowledge through practice.
Everyday Benefits and Kitchen Versatility
Tomatoes bring balance and brightness to nearly any dish. They pair naturally with herbs like basil, oregano, thyme, and parsley; with onions, garlic, and peppers; and with proteins ranging from beans to fish and poultry.
They also serve as a base for numerous cultural staples:
Italian: Pasta sauces, bruschetta, and margherita pizzas.
Mexican: Salsas, pico de gallo, and tomato-chile stews.
Indian: Tomato curries, chutneys, and masala gravies.
Mediterranean: Tomato-cucumber salads, stewed vegetables, and roasted spreads.
American and Southern: Fried green tomatoes, tomato gravy, and canning traditions.
Their diversity of form—round, pear-shaped, oblong, ribbed, or miniature—mirrors their diversity of use. Each variety, from a sun-warmed cherry to a dense Roma, brings its own balance of sweetness, acidity, and aroma to the plate.
Environmental and Garden Benefits
Beyond the kitchen, tomatoes contribute to ecological resilience:
Pollinator Attraction: Tomato blossoms draw bumblebees and native pollinators.
Companion Planting: Pair well with basil, marigold, garlic, and carrots to deter pests and enrich nearby crops.
Soil-Building Potential: Mulching tomato beds with compost and organic matter strengthens soil structure for future plantings.
Diversity Preservation: Growing multiple tomato types maintains genetic diversity, supporting the larger ecosystem of cultivated food plants.
Complete tomato seed-saving guide
1. Selecting Plants for Seed Saving
Healthy, well-adapted plants form the foundation of a strong seed line. Select only plants that are disease-free, vigorous, and true to type. Look for traits you wish to preserve—flavor, yield, fruit size, shape, color, and resilience to local conditions.
Mark these plants early in the season with colored ties or labels. Observe them through harvest, ensuring they maintain strong growth and fruit uniformity. Avoid saving seeds from hybrid varieties unless intentionally breeding for new traits, as hybrids will not breed true. Open-pollinated and heirloom tomatoes are ideal because they reproduce faithfully from one generation to the next.
When possible, save from at least six to ten plants per variety to maintain genetic diversity and avoid narrowing the gene pool.
2. Harvesting Seeds
Allow fruits to ripen fully on the vine until they develop deep color and softness. Overripe tomatoes produce the most mature, viable seeds.
Harvest carefully to avoid bruising.
Slice the fruit across its middle (not stem to blossom end) to expose the seed cavities.
Scoop out the seeds along with the gel (locular material) into a clean glass or ceramic container.
Label each container with the variety name immediately to prevent mix-ups.
3. Fermentation: Nature’s Cleaning Process
Tomato seeds are encased in a gelatinous coating that contains growth inhibitors. Fermentation naturally removes this layer while reducing seedborne pathogens in an organic, chemical-free way.
How to ferment seeds:
Add enough non-chlorinated or rainwater to the seed pulp to make it fluid.
Loosely cover the container with a breathable cloth or lid to allow airflow while keeping insects out.
Place in a warm, shaded area (70–80°F / 21–27°C).
Stir the mixture once or twice daily to encourage even fermentation.
Within 2–4 days, a thin film or mold will form on the surface—this is normal. The process is complete when most viable seeds have sunk to the bottom and the liquid no longer appears gelatinous.
Do not ferment longer than 4 days, as over-fermentation can reduce germination rates.
4. Cleaning Seeds (Organic Methods)
Once fermentation is complete:
Add fresh water, stir, and let the good seeds settle.
Carefully pour off the floating pulp, debris, and non-viable seeds.
Repeat until the water runs clear.
Strain the clean seeds through a fine mesh or cheesecloth to remove excess water.
Optional organic sanitization:
Instead of bleach, use one of the following gentle, natural alternatives:
Hydrogen peroxide rinse: Soak seeds in a 3% hydrogen peroxide solution for 5 minutes, then rinse thoroughly with clean water.
Apple cider vinegar solution: 1 part vinegar to 10 parts water for 1 minute, followed by thorough rinsing.
Chamomile tea soak: Use cooled, strong chamomile tea as a mild antifungal rinse before drying.
Each option helps reduce fungal spores while maintaining organic integrity.
5. Drying Seeds
Spread cleaned seeds in a single layer on a ceramic plate, mesh screen, or parchment paper. Avoid metal trays and paper towels, which can stick or react with the seeds.
Dry in a warm, shaded, well-ventilated area—never in direct sunlight or above 95°F (35°C). Stir daily to prevent clumping and ensure uniform drying.
Seeds are fully dry when they feel hard and brittle, breaking rather than bending under pressure. This usually takes 7–14 days depending on humidity.
If drying indoors in humid climates, a small fan or food dehydrator on the lowest setting (around 85°F / 29°C) can speed the process safely.
6. Storing Seeds
Proper storage protects your seed legacy:
Packaging: Store dry seeds in paper envelopes for short-term or airtight glass jars for long-term storage. You may add a small pouch of silica gel, baked rice, or powdered milk wrapped in paper as a natural desiccant.
Labeling: Write variety name, year saved, and any notable traits or growing conditions.
Environment: Keep seeds in a cool, dark, and dry place. Ideal storage temperatures are between 35–45°F (1–7°C).
Avoid frequent temperature changes or exposure to moisture. Under good storage, tomato seeds remain viable for 4–10 years, sometimes longer when kept refrigerated or frozen with humidity control.
7. Testing Seed Viability
Before planting, test seed viability to ensure quality:
Moisten a paper towel with clean, non-chlorinated water and place 10 seeds on it.
Fold and seal it inside a plastic bag or covered dish.
Keep in a warm (75–80°F / 24–27°C), dark area for 5–7 days.
Count how many have germinated.
8–10 sprouts: excellent viability
6–7 sprouts: acceptable, plant more heavily
Below 6 sprouts: refresh seed stock next season
8. Preventing Cross-Pollination
Tomatoes are self-pollinating, but pollinators like bees can occasionally cause crossing between varieties. To ensure purity:
Space varieties 10–25 feet apart if possible.
Use fine mesh blossom bags or lightweight fabric covers on selected flowers to ensure self-pollination only.
Collect seeds from multiple fruits and plants to preserve genetic diversity.
For seed-saving gardens, consider grouping similar types (like all cherries or all beefsteaks) in separate zones to minimize accidental crosses.
Isolation is especially important if you grow rare or heritage varieties that you want to keep true to their line.
9. Record Keeping and Documentation
Good records turn seed saving into a living science. Record:
Parent plant characteristics
Harvest date and location
Fermentation duration
Cleaning and drying methods
Storage conditions
Germination test results
Add personal notes on taste, disease resistance, and performance in your region. This information builds a reliable record of adaptation over time, forming the backbone of your seed stewardship work.
10. Organic Tips for Success
Never use chlorinated tap water; it can damage the natural microbial balance in fermentation.
Compost the leftover tomato pulp and skins—they enrich your soil for the next growing season.
Rotate crops yearly to prevent soilborne disease buildup.
Encourage beneficial insects such as native bees, hoverflies, and lady beetles to maintain ecological pollination balance.
Avoid synthetic fungicides or seed treatments that disrupt the natural seed microbiome.
Rejuvenate seed lots every few years by growing out and resaving fresh seed to maintain vitality.
Label immediately—unlabeled seed is lost history.